
It could be a little bit intimidating when you will start using your first metal detector! That’s why many beginners keep asking and wondering whether these detection devices are easy to use …
… In this short Post, I will give you some insights about this question and what the actually make a give detection machine easy to use.
Are metal detectors easy to use?
Most metal detectors are quite easy to use, especially the models that are made for beginners or newbies to the hobby.
This is actually a good thing to start with the simplest models out there to dip your toes properly into this activity.
Basically, all what you need to do is to keep swinging your machine by keeping the search coil as closer as possible to the ground. And once you stumble upon a metallic target you should hear a sound indicating you’ve just passed over the target.
Depending on the model you are going to use, there are 2 main setting that you will be able to play with, these are:
- Discrimination: This feature will help you to filter the metallic trash you might come across so your machine would pick up the most valuable finds as much as possible. The rule of thumb is simple, while dealing with a trashy environment you should set the discrimination to maximum levels and start decreasing little by little until you start noticing that your machine starts pick up junk (nails, caps …) then that would be the right level of discrimination you should maintain. Otherwise, if the environment is clean (like fields), then you can decrease the discrimination as much as you want to not miss out on any target.
- Sensitivity: This simply helps your machine to be able to pick up smaller targets! In other words if you set the sensitivity quite high, you should be able to pick up signals coming from small sized coins or jewelry (small earrings …) for example.
Keep in mind that high-end metal detectors, on the other hand, are harder to deal with! These kinds of machines are designed mostly for seasoned detectorists who are using them for specific but high lucrative tasks like gold prospecting, treasure hunting or even underwater shipwrecks prospecting!
Examples of easy to use Metal Detectors
1. Bounty Hunter Tracker 4
![]()
The Bounty Hunter Tracker IV (Check it Here at Amazon) is one of the easiest models you can get.
Not only is it a great entry-level machine for children and adults, but it is also budget-friendly and has all the functions that you would need in a basic metal detector.
It only has two knobs to tweak sensitivity and discrimination plus a switch. Furthermore, its lightweight design makes it ideal for you to get used to carrying a detector.
The Tracker IV is a 6.7 kHz VLF (Very Low Frequency) device that has 3 search modes along with an adjustable stem.
It also has a waterproof search coil, preset ground balance and automatic tuning, and can also be used to detect in salty conditions.
2. Garrett AT Pro
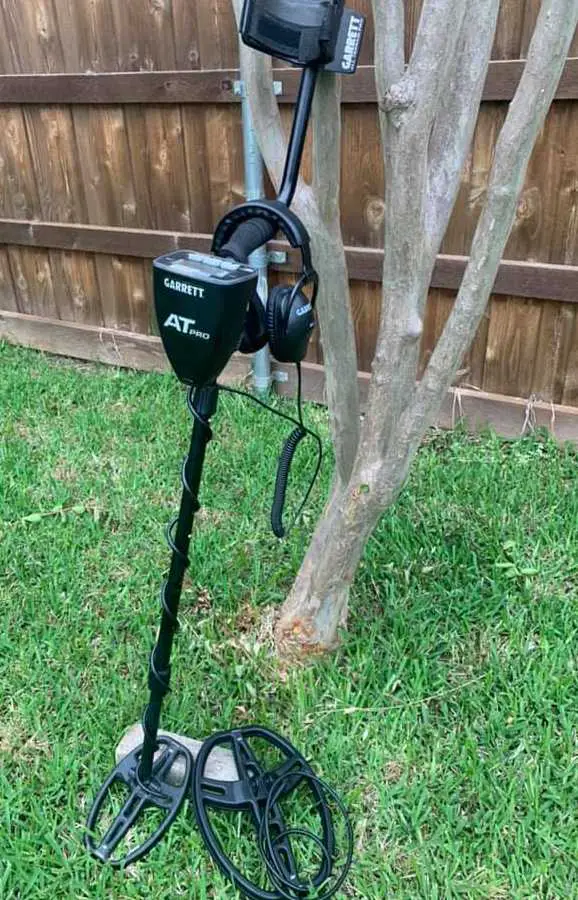
The Garrett AT Pro (Check it Here at Amazon) is one of the most versatile machines!
It is a VLF and very popular model and does not have a multi-frequency technology, so it will not overwhelm you while you learn your way around metal detecting.
However, the relatively high operating frequency of 15 kHz makes this machine highly sensitive to smaller targets.
The AT Pro comes with both manual and automatic ground balance and the other notable features is the audio mode, notch discrimination, and the pinpointer mode the device comes with.
The detector is also fully waterproof and can be submerged up to a depth of 10 feet.
What are the hardest metal detector features to deal with?
In my humble opinion, there are few features that you might find few difficulties to understand, especially at the beginning, these include:
- The detector search modes: Each model has its own search modes, but in most models the modes are (all-metal, jewelry, coins, relics …). Of course these modes are fine-tuned to help you find these elements, but you should not rely on them blindly. You really need to have a deep look at your machine’s manual or even at some youtube videos to be able to understand the capabilities of each mode. Yet, the best way to understand that is by doing bench tests! Learning by doing is the best way to go, at all times …
- Iron Bias: This feature was first introduced by the Equinox Series from Minelab. This is a technology giving your detector the ability to differentiate between a ferrous (junk) and non-ferrous (valuable) target when they are located together!
- VDI screen: This is mainly a scale from 0 to 99 in some machines and from 0 to 49 in others, you can find different scales depending on the model, brand and manufacturer. Bottom line the higher the number the higher is the electrical conductivity or/and the size of your target. This also means that your target is probably closer the surface. And vice versa … This is something you need to play with a lot, so you can get a feel or the targets you might pick up even before digging.
Conclusion
Hope that short post was somewhat helpful and that you’ve got your question answered properly! If not, just let know …
… Other than that, if you want to learn more about these machines you can check this guide on to read a metal detector. You will learn a lot!